
Happy Easter Sunday everyone and welcome back!
Now we all know that crafters don't really need an excuse to 'play' with their crafty stash but just in case you do, why not play along with this months challenge. Our theme is easy peasy ...
Anything Creative Mixed Media Goes
Our sponsor for 2018 is Polkadoodles and you can check out all the wonderful selection of Polkadoodles goodies in the shop. Have you visited recently? If not pop over now as there are oodles and oodles of new goodies waiting to be re-homed 😇
You don't have to use our Polkadoodles products to enter but we do a happy dance when you do lol.
The challenge closes 29th April 2018 so there's loads of time to play along. Our prize isfrom Polkadoodles for our lucky winner, (chosen by random.org)...
You don't have to use our Polkadoodles products to enter but we do a happy dance when you do lol.
The challenge closes 29th April 2018 so there's loads of time to play along. Our prize isfrom Polkadoodles for our lucky winner, (chosen by random.org)...

Prize: $10 voucher to spend at Polkadoodles
Now let's check out the inspiration from our DT. As you can see our talented team have been busy working their creative/mixed media magic for you .....
This month we have a fabulous Guest Designer joining us!
We love her creative work and are thrilled to have her with us, so here's a little insight into our fab Guest Designer:
Tina de Marche...
make sure you check out her blog HERE.....

I'm a mom to 4 boys, so there's never a dull moment in my house. I've always been surrounded by crafty people in my family (it's a big family), so my hands love to stay busy. If it's not crafting, it's cooking or gardening that I enjoy doing. I've been making cards for 14 years now, started in a Calligraphy group, then later on, I got into stamps. I love to learn and try new things out, so I'm hoping to inspire you to do the same.
I used molding paste, stencils, tissue paper, inks and paints to create the background. Embellishments were also painted, inked, and sprayed to created harmony.

I had fun with this little canvas, it was complete and total play time for me, and I really like the end result. I threw so many different thin layers of mediums on it, I'm not sure I will remember them all pop over to my blog and see how many I do remember.

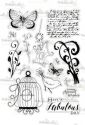
Belle Papillon Stamp Set


Jan For my tag I used Polkadoodles stamp set that I heat embossed I then used watercolour paints .For the background I used Distress Oxides. I love making tags so simple yet you can add so much

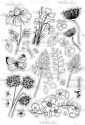
Terry, Hey there crafters out there, I made a card for you this time, for your inspiration. I have worked on the background with lots of distress inks, mixed them all together to create these colors. Than I could use my Stampplatform for the very first time, I must say a Stamp platform is such a handy tool to use when you are creating WITH stamps, just fabulous. So I have created these flowers with the fabulous stampset Regal Peacock and Bella Fleur. And I have colored the flowers and the Moth with Distress Oxide inks, on top I have worked with the Glitter Shake Markers, they work wonders on your stamps....The background was finished with a Sentiment and those cute little leaves. Wanna see more, than I suggest you come over to my blog and check it out.

Julia here, I Altered this watering can. First I primed with Gesso. I then used the gorgeous stamp sets, Blossom, Dotty about Flowers & Heavenly Bluebells http://www.polkadoodles.co.uk/stampin-unicorn/ & stamped onto rice paper. I then coloured using Ecoline pens & adhered it using a decoupage medium. Used a metallic finish paint for the rest of the can, & then added some string & created a little flower using stone paper.

 |  |  |  |

WINNERS FROM CHALLENGE 6
Thankyou everyone who entered this challenge - we really loved looking round your blogs, you all left us some awesome work to pore over!
Our Random winner chosen by Random.org is: #55 Danielala
PRIZE: $10 gift voucher to the Polkadoodles Store.
To claim your prize please email Polkadoodles, quoting 'Love 2 Create winner' in the subject bar. Please include this claim code L2Cwk6001 in your email and allow 14 working days for a reply please.
TOP 3 DT FAVOURITES (no particular order):
#67 Paper Beauty
#10 Alice P
30 Kakichka
Thankyou all so much for your wonderful entries, very creative, we loved them!
A big thank you to everyone who entered last month's challenge and winners, plus Top 3, will be announced on the next challenge.
Just in case you have missed any winners posts, previous winners, Top 3 and GDT's can be found on our 'Winners Page' at the top of the blog.
Just add you entry below in Mr Linky and if you would like to appear as a GDT on Love 2 Create Challenges, just add GDT after your name.
The Love 2 Create team can't wait to see what you have created this month ...
Mister Linky's Magical Widgets -- Thumb-Linky widget will appear right here!
This preview will disappear when the widget is displayed on your site.
If this widget does not appear, click here to display it.
This preview will disappear when the widget is displayed on your site.
If this widget does not appear, click here to display it.


