Good morning crafty friends, are you all organised for Christmas? Why not take a break from the Christmas preps and have a bit of creative fun and join in our new challenge here at We Love 2 Create!! A big thank you to everyone who entered our last challenge, we'll be announcing the winners next week along with Top 3 honours so make sure you pop back!!
We're keeping our theme nice and easy for you ...
Anything Mixed Media/Creative Goes
You don't have to use our products to play along but of course we love it when you do! As always we've got some lovely crafty goodies up for grabs for our lucky winner thanks to our generous sponsors Premium Craft Brands so don't miss out on your chance to win!!

The random winner and Top 3 for Challenge #25 will be announced next week, so check back to see if it's you! We're giving our hard working DT a bit of a break over Christmas and New Year but we'll be back with a bang (and lots of inspiration) on 3rd January!
Let's check out the beautiful artwork our DT have created:
Nikky...I made a project similar to this a long long time (like years) ago and I liked it so much that when I came across it in a box recently I decided to create another using my PanPastels. I just cut out a heart using a die and some sturdy cardstock and then gesso'd it to create a foundation. I coloured using my favourite turquoise and some violet and aquamarine and a mix of others in there too I think...
I have to say when I do mixed media I just throw everything at it and forget to write down what I'm doing as I go, I mixed in some of the pearlescent white to create a nice sheen...used Gold Shake Marker around the edges and just splodged it around and smudged it with my fingers to make it look like it had been gold leafed. Then I added Maimeri gloss gel over the top and once it had all dried I just bent it and it all cracked up. A simple Ranger lock and a Tonic die-cut inked up with Versamark and stamped with stars to co-ordinate and Bobs your uncle. I will cut a hole in this and then thread wire to make a hanger I think...
You can get a better idea of the texture and crackles here...
Yvonne - This is a page from my Altered Dictionary. Panpastels are great for this work as you can't really use Alcohol pens or water based pens as the paper is so thin that it soaks through. Panpastels work beautifully on this paper as it seems to grip them and the colours remain intense. I did loads of stamping with masquerade style stamps and then began to colour. Finally I added glitter to the lips, eyes and jingle bells!
More details and photos over on my blog if you have time to grab a cuppa and take a look xx

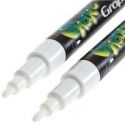
Claire I've altered this MDF word to create a little Winter Wonderland scene, I didn't have a lot of time but PanPastels are fabulous to create a very quick background. I'd already created a crackle background on the MDF using acrylic paints but I set to and made a bit of a forest background on some card (cut to shape using a dinner plate lol) . I stamped the trees with Versamark ink and used shades of Phthalo Blue PanPastel to shade the trees.I blended the excess out to create the sky but forgot to mask the moon, doh! Not a problem with Pans though as they are erasable so I used a circle die and a pencil eraser to create my moon. I added some falling snow with a White Graph'It Shake pen before attaching to the back of the MDF. Next I cut out three snowdrifts from white card, smothered them with texture paste and brushed over Course White Pearl Medium, it gives a beautiful frosty sparkle! I layered up the snowdrifts with silicone glue and popped my little image (coloured with Graph'It Markers) behind the 'O'
I created some snow on the word itself and along the front by applying texture paste and again dusting with White Coarse and Fine PanPastel Medium

Terry: Oh my I had so much fun making all the Candle Jars, I started out with a Jar, the background was made wit Jute Strips and white lace.....The top op the Jars were decorated with Snow and White Coarse to give it a bit of a shimmer. The Wooden hearts were attached with rope and the background of the hearts were worked on with Gesso, White Coarse, White Pans and the Christmas Sentiments were stamped with ink and Metallic PanPastels. The last layer was painted with Iridescent Paste. To finish I placed the wooden sentiment Xmas and colored the letters with Iridescent Paste and stamped it with Metallic Pans. And last but not least I placed a little Christmas Bell to the rope. If you wanna see more Candle Jars you can see the detailled pictures on my blog.

Gorgeous makes as always ladies!!
We'd just like to thank all our friends and followers a very
Merry Christmas and a
Happy New Year!!
We''ll be back in 2016 with lots of projects to inspire you and of course plenty of tips and techniques too!
Mister Linky's Magical Widgets -- Thumb-Linky widget will appear right here!
This preview will disappear when the widget is displayed on your site.
If this widget does not appear, click here to display it.
This preview will disappear when the widget is displayed on your site.
If this widget does not appear, click here to display it.







Gorgeous pieces ladies. Hope,you are all well. Have a wonderful Christmas. Hugs. Tracy x
ReplyDeleteNice!
ReplyDeleteLovely inspiration from the team as always. Happy New Year to all!
ReplyDeleteAlison x